- Get an extra large QR image at http://qrcode.kaywa.com/
- Open the image in Photoshop
- Image > Image Size - Document Size: 50mm x 50mm, Resolution: 300pxels/inch, Nearest Neighbor (preserve hard edges)
- Select Magic Wand Tool - Tolerance: 100, Check off Anti-Alias, Check off Contiguous
- Select all the black areas
- Copy and paste the black areas onto a new layer
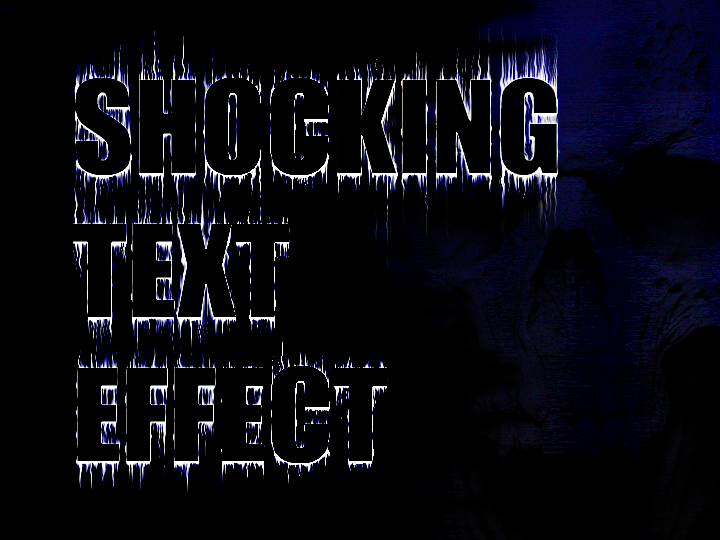
- Create a new layer and fill it with black
- Type text in white
- Duplicate the text and hide the layer
- Rotate the visible text 90 degrees clockwise
- Filter > Stylize > Wind - Method: Wind, Direction: From the Right
- Filter > Stylize > Wind - Method: wind, Direction: From the Left
- Rotate the visible text back 90 degrees counter-clockwise
- Repeat the previous step on both sides
- Filter > Distort > Ripple - Amount: 50%, Size: Small
- Filter > Sharpen > Unsharpen Mask - Amount: 100%, Radius: 5px, Threshold: 0
- Apply Outer Glow
- Reveal the hiden text and fill it with a different color
- Apply Stroke - Size: 1, Position: Inside, Blend Mode: Normal, Opacity: 50%, Color: White
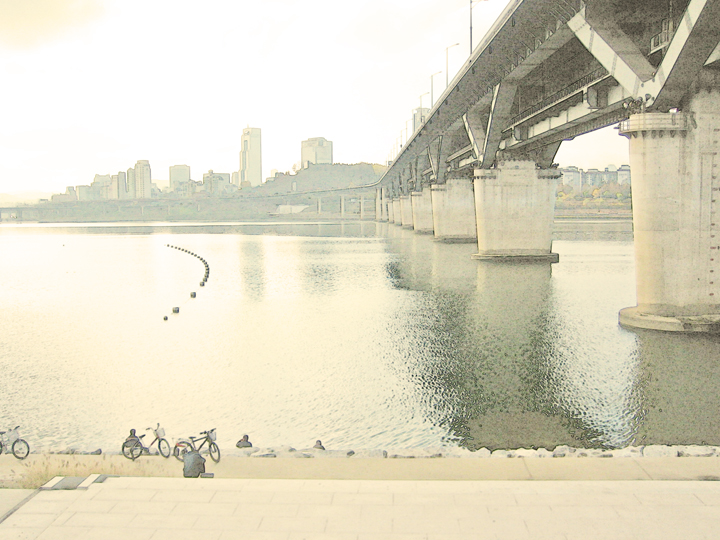
- Open an image and duplicate the layer
- Image > Adjustments > Shadow/Highlight - Shadow Amount: 100%, Highlight Amount: 0%
- Filter > Stylize > Find Edges
- Edit > Fade Find Edges - Opacity: 30-50%, Mode: Luminosity
- Set the layer to Screen if it works
- Adjust Brightness/Contrast
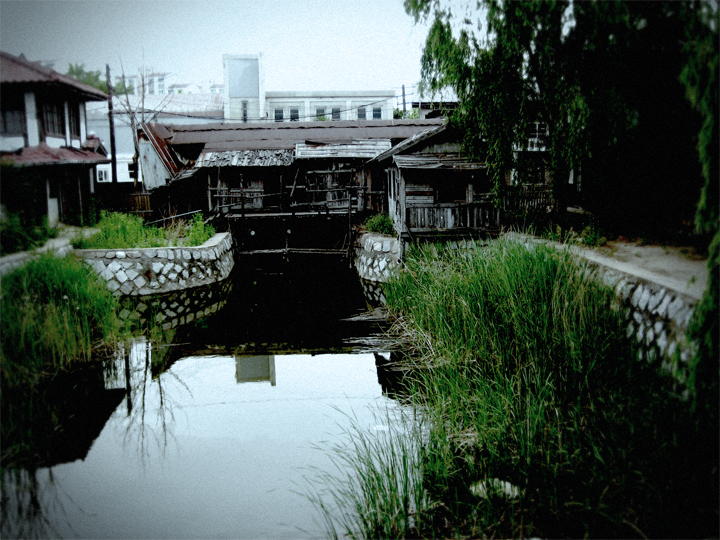
- Open an image
- Image > Adjustments > Hue/Saturation - Saturation: -50
- Image > Adjustments > Exposure - Exposure: 1, Offset: -0.15, Gamma 1
- Duplicate the layer
- Filter > Blur > Lens Blur - More Accurate, Radius: 10, Blade Curvature: 10, Rotation: 50, Brightness: 10, Threshold: 200
- Add Layer Mask to the top layer and create a focus point - Brush Tool - Hardness: 0%
- Create a new layer and fill it with black
- Lower Opacity of the layer to 70%
- Erase the center of the black layer - Eraser Tool - Hardness: 0%
- Flatten all the layers
- Filter > Noise > Add Noise - Amount: 5

- Create random shapes with a few colors to fill the canvas
- Flatten all the layers
- Filter > Distort > Twirl - Angle: 200
- Filter > Blur > Gaussian Blur - Radius: 50px

- Prepare a colorful image
- Select a certain area of the photo and stretch it to fill the canvas
- Experiment with the outcome
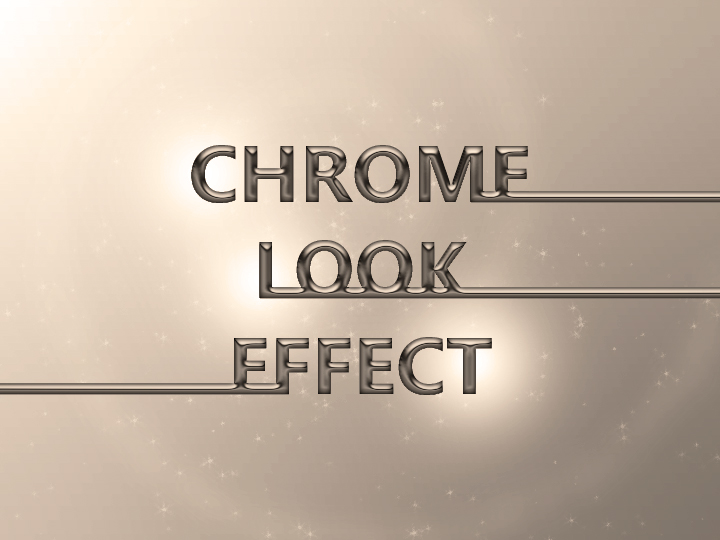
- Type text in black and duplicate it
- Change the color of the top text to light gray
- Select the text shape of the top text
- Filter > Blur > Gaussian Blur - Radius: 3
- Filter > Blur > Gaussian Blur - Radius: 1.5
- Filter > Render > Lighting Effect - Style: Default, Intensity: 28; Texture Channel: Transparency, Height: 30, Angle: Top left
- Image > Adjustments > Curves - RGB 3 points
(Input: 60 - Output: 180)(Input: 120 - Output: 60)(Input: 180 - Output: 180)

- Edit in Quick Mask Mode
- Create a mask with Reflected Gradient Tool
- Filter > Blur > Lens Blur - Radius: 20, Blade Curvature: 0, Rotation: 0
- Image > Adjustments > Hue/Saturation
- Prepare an image
- Duplicate the image layer
- Set the foreground color black and the background color white
- Filters > Sketch > Photocopy - Detail: 24, Darkness: 10
- Filters > Sharpen > Sharpen More
- Repeat the previous step a few times
- Set the layer to Overlay
- Select the original layer
- Adjust Hue/Saturation

- Type text in color
- Effect > Distort > Glass - Distortion: 10, Smoothness: 10, Texture: Blocks, Scaling: 200%
- Expand Appearance
- Live Trace